

Showing posts with label Christmas Joy. Show all posts
Showing posts with label Christmas Joy. Show all posts
Friday, December 21, 2018
Christmas Joy Cards for Paper House Productions
Merry Christmas! It's so close. Here are some cards to lift your spirits. They are made with the Paper House Productions Christmas Joy collection. The 3D and puffy stickers with a little washi tape make them fun to make.
 Thanks for stopping by! Have a great day!

Monday, December 3, 2018
So Very Merry for Paper House Productions and Thermoweb
This week the Paper House Productions team is teaming up with Thermoweb. They have all sorts of foils and adhesive products. I've never used foils before so this was a lot of fun adding something new to my repertoire.
 What better way to show off foil than with Christmas lights? I've been wanting to use some of the cut files I've purchased so the Paige Evans tree became my starting point. I sprayed mist on the tree and spread it with a paint brush. Just before it dried I sprayed it with Color Shine.
I cut the Christmas lights with my Silhouette Cameo. The cord was in black, the lights in white. I used a glue pen to spread adhesive on the lights and let them dry. Then I placed the foil with the color side up and pressed it firmly into the adhesive. Then I peeled the foil liner away. I also foiled the star on top of the tree and the title. I also used black photo corners from Thermoweb to add more interest to my photos.
I outlined the tree with a pencil on my base paper. Then I spread yellow ink with a foam dabber. To finish off the layout I used the Paper House micro stickers to add touches to the tree, stars to the background and presents under the tree.
Please check out the links below for some awesome products and make sure to see what the design team has been creating all week!
Supplies
Thermoweb:
Deco Foil Transfer Sheets - Red
Deco Foil Transfer Sheets - Black
Deco Foil Transfer Sheets - Champagne
Decorative Photo Corners - Black
Deco Foil Adhesive Pen
Paper House Productions:
Peace Joy and Love Paper
Gold Dots 12" Paper
Christmas Magic Cardstock Multi Pack
Merry and Bright 3D Stickers
Christmas Joy Micro Stickers
Paige Taylor Evans Christmas Tree cut file
Jillibean Soup lights cut file
So Very Merry title from The Cut Shoppe
Black cardstock
DCWV grey cardstock
White cardstock
Mr. Huey's Cash Money green mist
Heidi Swapp Color Shine lime
Yellow ink
Black fine tip Sharpie pen
Thanks for stopping by! Have a great day!
Monday, November 26, 2018
Filled With Joy for Paper House Productions
I can't believe it's time to get ready for Christmas. I've got so many pictures from last year (ok, and many previous years), that I need to get scrapping. I used the Christmas Joy line from Paper House Productions for this layout.

Filled With Joy cut file from Paper Issues
White cardstock
Black fine tip Sharpie pen
Thanks for stopping by! Have a great day!

I used a cut file from Paper Issues. I backed the circles with the gold circles from a Christmas Joy paper. The stars I covered with a variety of gold star stickers.
Supplies
Paper House Productions
- Christmas Joy craft setFilled With Joy cut file from Paper Issues
White cardstock
Black fine tip Sharpie pen
Thanks for stopping by! Have a great day!
Tuesday, December 19, 2017
Christmas Joy Layout Inspired by Pinterest for P.H.P.
I'm so excited for Christmas but also sad that this is my last post as part of the 2017 Design Team. This has been such an amazing experience for me - thank-you Paper House Productions! Now for my final layout. Our theme this week is to be inspired by a layout from the Paper House Productions Pinterest page. I chose a layout by our fabulous team leader - Christine Meyer.
Here is my layout:
 Here is Christine's layout:
 Supplies for Christmas Joy Layout: Christmas Stick On Pockets, Christmas Puffy Sticker, Merry & Bright 3D Stickers, Christmas Memories 12" Double Sided Scrapbook Paper, Better When Camping 12" Double Sided Scrapbook Paper, Christmas Joy Tags 12" Double Sided Scrapbook Paper, Christmas Joy 12" Acetate Paper, Christmas Magic Cardstock Multi Pack, Gold Dots 12" Double Sided Scrapbook Paper.
 I thought putting paint behind an acetate paper was a brilliant idea. It was so much fun. I splattered and smooshed it with plastic packaging on a piece of white cardstock. The plaid paper is from the Great Outdoors collection and the remainder is from the Christmas Joy collection.
 I cut the stars from the stick on pockets. This was a great way to stretch my supplies. I've made so many layouts and cards with this collection!
Thanks so much for stopping by! Be sure to stop by the Pinterest page for lots of inspiration for your Paper House goodies! Happy Holidays!
Here is my layout:


Thanks so much for stopping by! Be sure to stop by the Pinterest page for lots of inspiration for your Paper House goodies! Happy Holidays!
Thursday, December 7, 2017
Christmas Joy Layout for Paper House Productions
Are you getting excited for Christmas?! I sure am! I'm back today with a scrapbook layout using the Christmas Joy collection from Paper House Productions. There are so many fun stickers and pretty papers, this layout was easy to make.
 Supplies for Christmas Joy Layout: Christmas Memories 12" Double Sided Scrapbook Paper, Merry and Bright 3D Sticker, Christmas Magic Cardstock Multi Pack, Christmas Flake Stickers, Christmas Puffy Clips, Christmas Stick On Pockets, Peace Joy and Love 12" Double Sided Scrapbook Paper, Christmas Joy Tags 12" Double Sided Foil Scrapbook Paper.
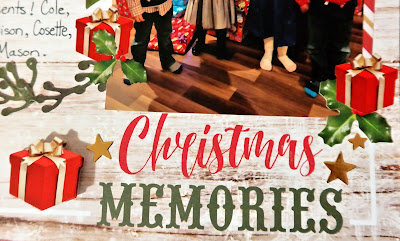
I began with these two pictures of super excited children eagerly awaiting their gifts. I really love the Christmas Memories paper so I used it as my background. I cut out the wreath with my Silhouette Cameo using the Peace Joy Love paper. Next I layered the stripe paper behind my photos. On the other side of the photos, I used the poinsettia stick on pockets. The holly leaf stick on pocket is perfect for holding one of my pictures.
 Can you find the flake stickers on my layout? They blend in so perfectly, it is hard to tell they are not part of the pictures. The star on the tree, the Santa hat, the holly leaves and four of the presents are flake stickers.
 To finish the layout I used a 3D title and pulled the puffy clip present off the clip to add dimension. There are also cardstock stickers for some sentiments, the date and star embellishments.
Make sure to stop by the Paper House Shop to pick-up some Christmas goodies! Have a wonderful, scrappy holiday season!

I began with these two pictures of super excited children eagerly awaiting their gifts. I really love the Christmas Memories paper so I used it as my background. I cut out the wreath with my Silhouette Cameo using the Peace Joy Love paper. Next I layered the stripe paper behind my photos. On the other side of the photos, I used the poinsettia stick on pockets. The holly leaf stick on pocket is perfect for holding one of my pictures.


Make sure to stop by the Paper House Shop to pick-up some Christmas goodies! Have a wonderful, scrappy holiday season!
Thursday, November 30, 2017
Christmas Joy Cards for Paper House Productions
Hello! I'm here to show you three really fun Christmas cards. I used the Christmas Joy Life Organized collection by Paper House Productions. All three cards required my Silhouette Cameo and corresponding files from their store to cut the images. I just love how they turned out!

Supplies: Christmas Puffy Sticker, Christmas Epoxy Sticker, Christmas Rice Paper Border Sticker, Peace Joy and Love 12" Double Sided Scrapbook Paper, Christmas Memories 12" Double Sided Scrapbook Paper, Christmas Joy Tags 12" Double Sided Foil Scrapbook Paper, Merry and Bright 3D Sticker, Christmas Magic Cardstock Multi Pack.

This snowman card is a piece of 12 x 12 white cardstock folded and then cut in half. I cut a square of the stripped paper and a slightly smaller square of brown paper. The first layer of the snowman is brown, then white, then red. I finished it off with some buttons and google eyes from my stash and Life Organized puffy stickers.

The window card is a layer of red paper, then white, then brown. The reindeer, trees and green strip are from the rice paper border stickers. The stars are a mix of epoxy and puffy stickers and the sentiment is from the cardstock multi pack.

The candy cane card is a layer of brown paper that I back-stitched with embroidery thread before adhering it to the white cardstock. I cut those candy canes a few times before getting the stripes to line up the way I wanted! The center stickers are 3D and the surrounding stars are epoxy stickers.
Thanks so much for stopping by! Now I just need to decide who gets to receive these cards!
Subscribe to:
Posts (Atom)