Saturday, February 20, 2021

Enjoy the Ride Layouts and Card - Part 2

 Hello! I'm back again with a few more layouts and a card using the January Kit. This kit features the Altenew 'Enjoy the Ride' Collection. It is so pretty I can't wait to show you!

Ride Baby Ride


Have you been playing along this weekend with our online crop? If not, head over to the Facebook group and join in on the fun. This is the layout I featured last night for the Cut File Challenge. Make any project using a cut file of your choice. If you would like to use the Pie Chart one I used, you can download it free here. Make sure you upload your project to the challenge album to be entered to win a prize!

This layout was inspired by the bicycles in the collection and the fact that the picture matches the colours in the kit. I chose a cut file that looks like a wheel. The cut file is made by Juliana Michaels and has given me permission to share the file with you. If you're a card maker, you will want to check out her work! I resized the circles to three different sizes and backed each section with a different patterned paper. 

To create the background, I covered the white cardstock with gesso. I smooshed watered down pink paint with a piece of plastic around the page. I then splattered a darker pink and a green around the circles. I propped up the picture and one bicycle with foam. The purple letters in the title come with the kit and the green letters are by Simple Stories and are from a previous kit. The remainder of the pieces come from the two ephemera packs and chipboard stickers.

Cotton Candy


This was actually the first layout I made with the kit. I just love the blue pattern paper. I didn't want to cover too much of it up so I put my pictures more in the middle. The middle paper is just the reverse side of the pattern paper. I tore the paper, layered some chipboard and flower ephemera, added a title and done! So easy yet one of my favourites.


Wonderful Happy Day


This layout began by trying to build a wreath around a circle. I started painting the circle and it went a little wonky so I changed it into a butterfly. I used some embroidery floss to stitch the outline and layered lots of flowers from the ephemera pack. I even made eyes using two O's from the chipboard letters.


Miss You Card


I used some of the leftover pieces to make this cute little card. The Parakeet cardstock worked really well to pop out the title and ephemera. 

Thanks for checking out the projects! I hope you'll join us for the crop today!

Wednesday, February 17, 2021

Enjoy the Ride Layouts and a Card

 Hi scrappy peeps! I'm back with another post for Scrap Shotz. I've made some scrapbooking layouts using the January kit. This kit features the beautiful Altenew 'Enjoy the Ride' Collection. There are so many big flowers on these papers just asking to be fussy cut! 

Theo's Baby Shower


I made this layout using the February sketch from Creative Scrapbooker Magazine. 
I used a Vicki Boutin stencil from a previous kit to make white gesso circles in the background. The pictures are backed with the Sunbeam cardstock in the kit. I roughed up their edges. The flowers and leaves are all fussy cut and some chipboard letters and stickers finish off the layout. Here is a link to the papers in this kit.


Blossom and Grow

Zoom in on those socks! How cool is it that they match one of the papers in the kit? I didn't want to let the page get too busy so I built it on white cardstock and put just two thin strips of paper behind the pictures. This layout is so easy to make. Rip some paper for the corners, fussy cut the leaves and flowers, splatter some paint and voila!

 I also used the add-on stamp to add some black ink branches. I tucked a piece of ephemera behind the flowers on the bottom right and used a chipboard title. 


Inspiration is Everywhere

This layout began with the picture. My daughter actually took this selfie crawling into her fort. I wanted to make it look like she was peeking out from under the paper. I tore the paper so it fit around her head and added some more to the lower half of the page to balance it out. I layered some of the add-on flower ephemera and chipboard pieces. 

The final touch was to drip some paint down the layout to go with the paintbrush sticker and journal about her creativity. 

Thank-you Card

I stamped the sentiment using the add-on stamp. The flowers are made from washi tape. I used a Stampin' Up punch to make the petals. It is actually a punch with a dove and the petal is the dove's wing. I added many petals together to make the flower. I used a separate punch to create the centers of the flowers. I drew the stems with a marker and placed a piece of chipboard on top. 

That's all for now - but there will be more this weekend! I hope you'll be able to join us at the 'Staycation' crop in the Scrap Shotz Facebook Group. Friday 6pm - 10pm and Saturday 10am - 6pm. Lot of inspiration, games and prizes! Have a great day.

Saturday, January 23, 2021

Carta Bella Christmas Farmhouse Layouts and Cards

 Hello crafty friends! Remember Christmas? It seems so long ago now but I've been having fun scrapping all those Christmas pictures with the Carta Bella Farmhouse Christmas Collection. It has everything you need to make cards and layouts. I love how the patterned papers have nice background patterns on one side and something more fun on the other side. Here's what I put together.


For this layout I cut apart the signs on one of the papers. I used some of the cardstock in the kit to back the photo and topped it off with some cardstock and chipboard stickers. 


Brads from the kit and a piece of twine from my stash. This one uses lots of ephemera pieces. 


I saw a cut file similar to this style so I recreated the words in the tree with the stickers and Thickers in the kit. I used two shades of green ink and one yellow.


I used the January sketch on the Creative Scrapbooker Magazine's Sketchy Group Facebook page to design this page. 


I fussy cut the flowers for this page and chose a brush script font on the Silhouette for the title.


This one uses a few ribbons from my stash, gold paint and a cut file.


And here are a couple cards with the last few pieces from the kit. 
Thanks for stopping by and happy scrapping!

Saturday, January 9, 2021

One More Storyteller Layout

 Hello. Just popping in to post my latest Storyteller Collection layout from Scrap Shotz. 


I used some Distress Inks, chipboard stickers, puffy stickers and fussy cutting to create this look. I splattered some brown and gold paint at the end. The picture is framed by Bazzill Basics cardstock. 

Thanks for taking a look!

Tuesday, December 29, 2020

Storyteller Layout for Scrap Shotz

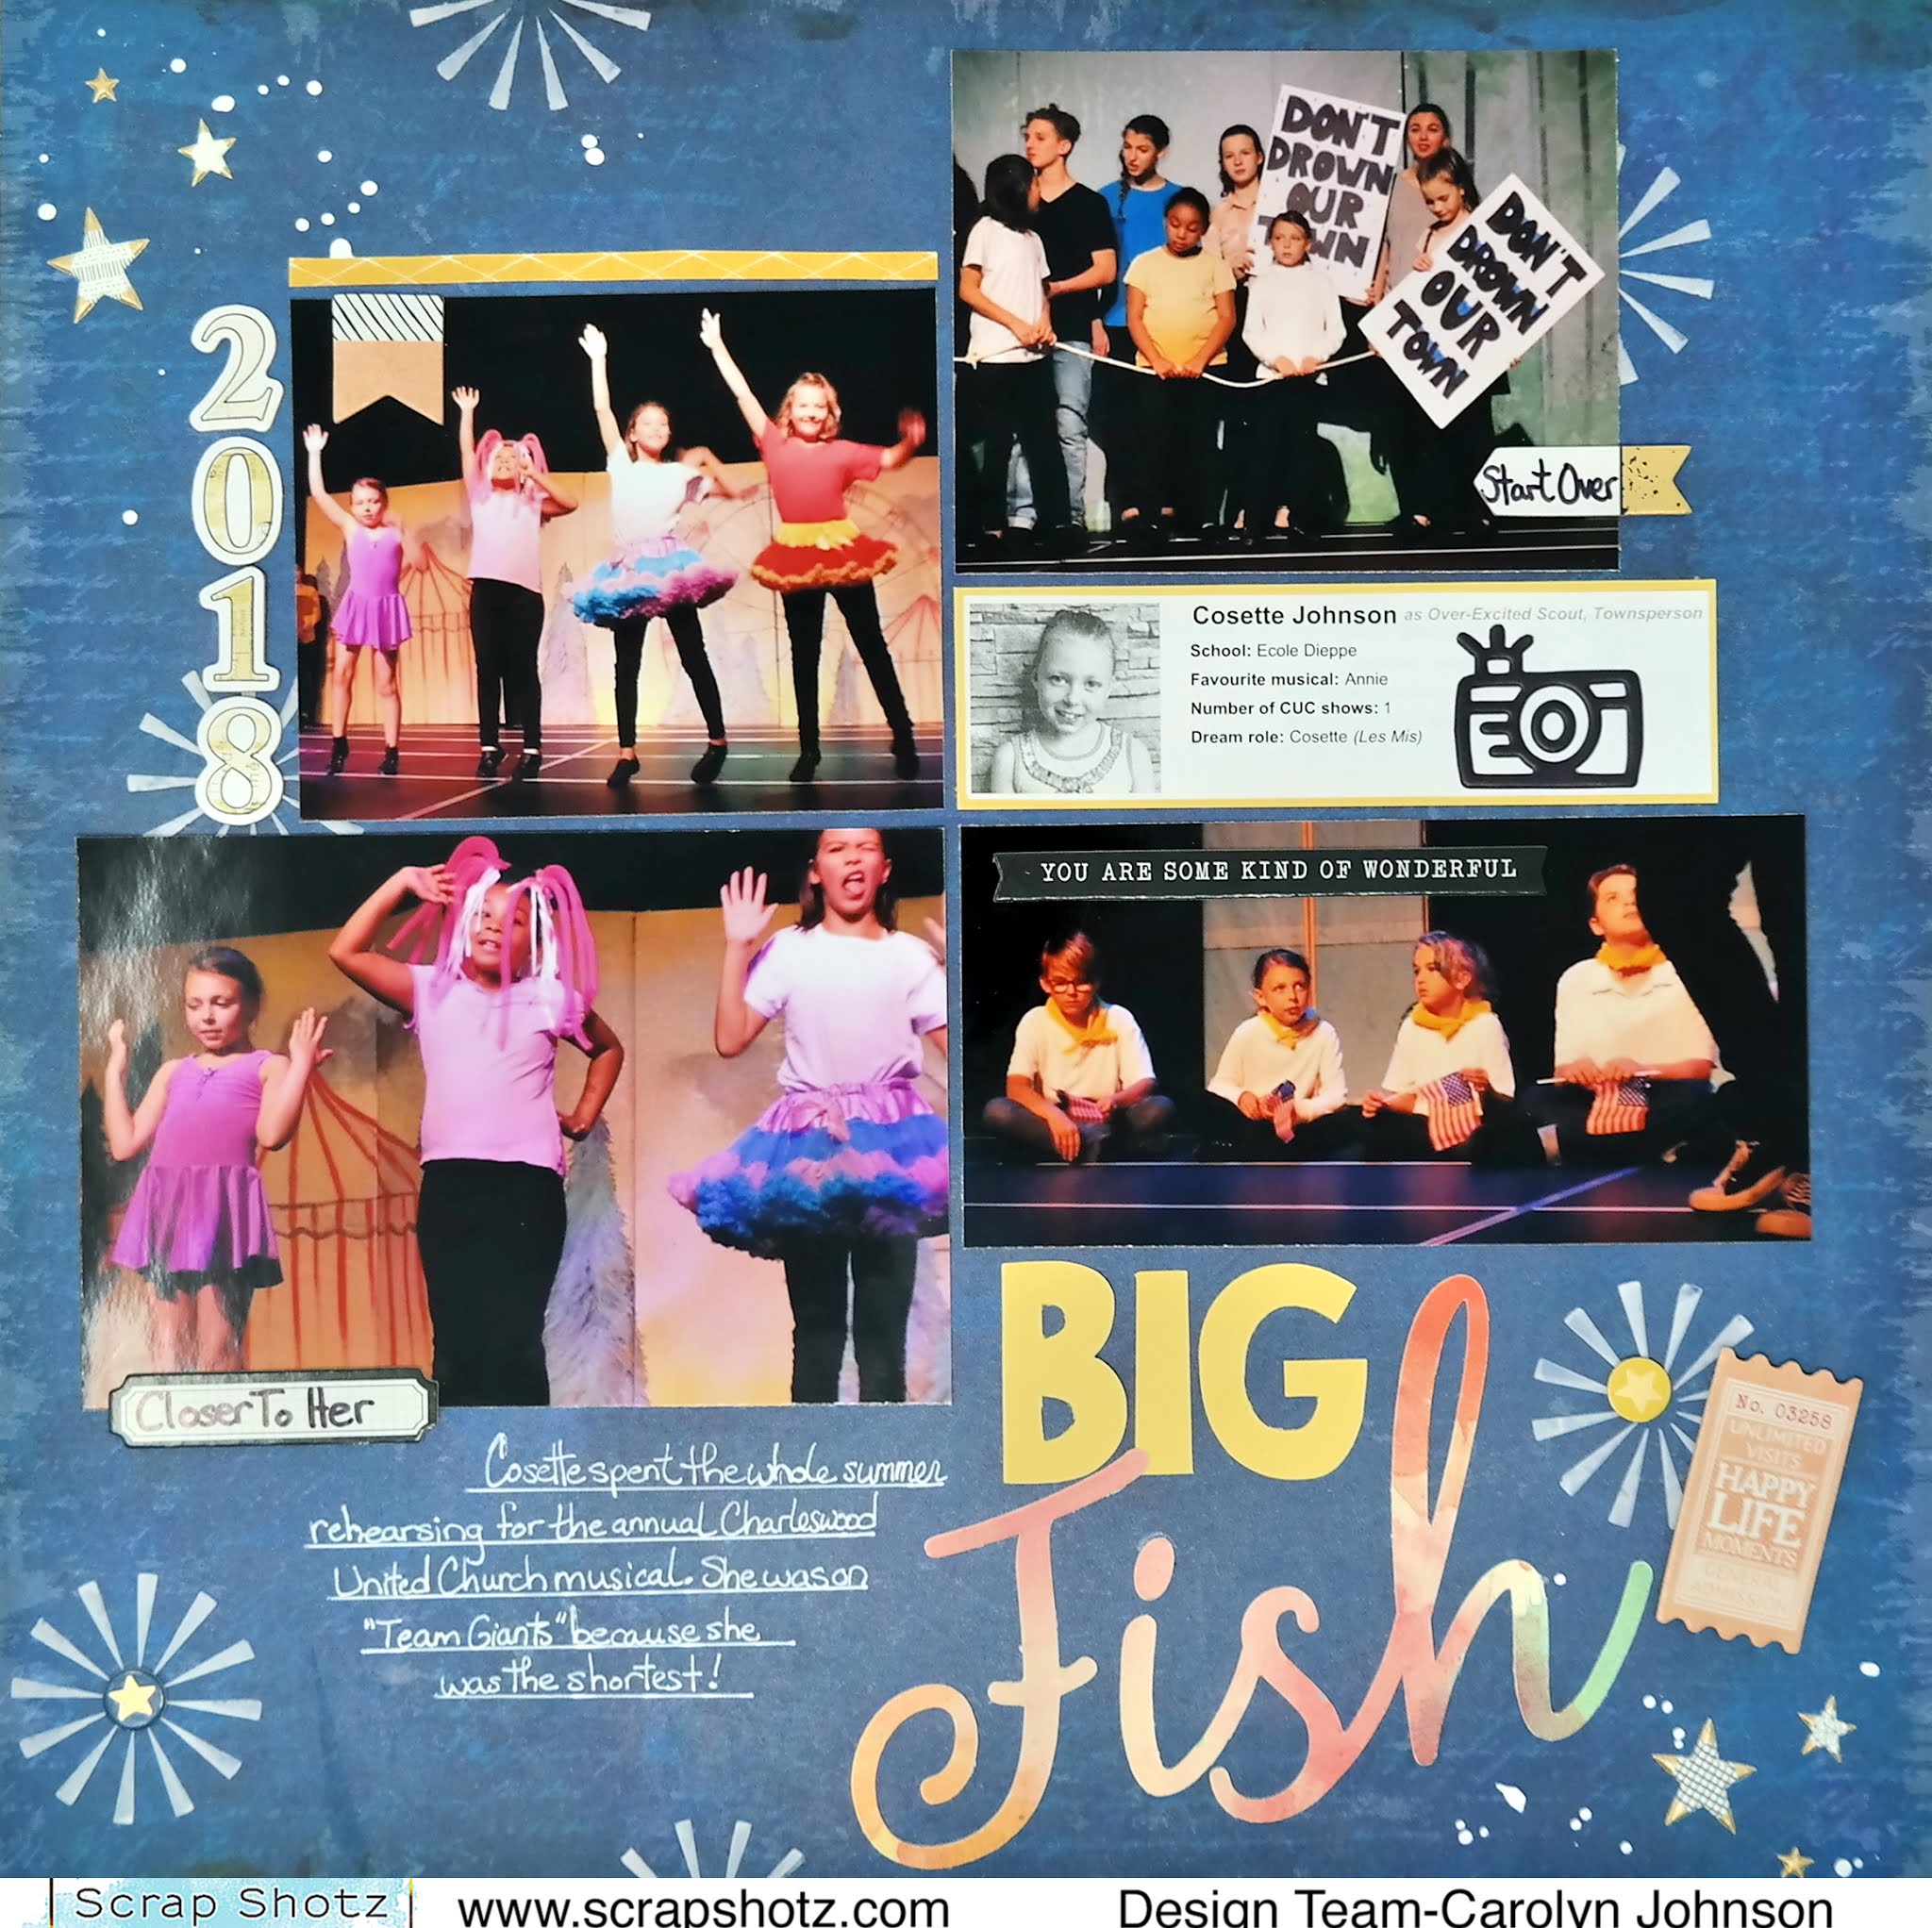
 I hope everyone is enjoying a lovely, scrappy holiday season. I used the November Kit to make this Vicki Boutin Storyteller Kit layout. The colours drew me to these pictures of my daughter in her first musical production. 


I really wanted to use the stencils in the kit so I chose this dark blue paper for the background and used white modeling paste with the stencil. This makes the design pop and I find the paste is thicker than paint so it doesn't ooze under the stencil. I mix paint into the modeling paste when I don't want to use the white colour. 
The title is made with the Bazzill yellow cardstock in the kit. The word 'fish' is made with the cardboard behind the stencils! I chose fonts I liked and cut out the words using my Silhouette Cameo.
The secondary title uses the Thickers in the kit. The stars are from the puffy sticker pack. I splattered some white gesso around the stars. I always mix some water into the gesso before splattering so it flies off the brush better. 
I captioned the pictures using the Thicker stickers. The writing uses a white pen.
The cute little camera is from the Puffy Stickers pack. 
That's all for now! Have a great week!

Friday, December 18, 2020

Vicki Boutin Storyteller for Scrap Shotz

  Hello scrappy friends. I'm so excited to show you the Vicki Boutin Storyteller mini album and a fun layout. This collection is like mixed media for those of us who struggle with mixed media. Half the work is done for you! These items were all in the November Kit. First up is the scrapbook layout.


I cut out all the layers of the rainbow paper and distressed their edges. Some of them I flipped over so you see the darker paper on the back. I ran it under my sewing machine to make it look more messy. 


The title is cut out from one of the papers. 

The background is made from random patches of distress inks. The remainder of the layout comes from the thicker stickers and phrases puffy stickers. 

The mini-album comes as a kit. I used all the pieces and added a few more of my own. I couldn't believe how well my pictures fit onto the different components - I just wish I had a few more from this event! I decided to document my daughter's drive-by grade 4 farewell. Here are two views of what the album looks like altogether. 


These are the smaller components that are all pre-made except for the tag on the right.


Here are the components where I added pictures.


Here are the backs of the previous components that I made. I didn't want to look at cardboard when the elements were flipped over. 


This is my favourite piece where I layered paper, thickers and puffy stickers.


This is the back of the previous component.


These are the elements where I did my journaling. The typewriter opens to blank page. 


That's all for now! Have a wonderful holiday season and I'll be back with more after the holidays.

Sunday, November 22, 2020

Winter Market Cards for Scrap Shotz

  Hello. Just popping in to show some cards that I made for a special project here in Winnipeg. As you may have seen in the news, we are in as close to a full lockdown as you can get. There are so many personal care homes struggling with outbreaks and/or visitor restrictions. Our local radio station is collecting cards for the residents. So my daughter and I spent the weekend making cards.

I made 4 cards with the Carta Bella Winter Market Collection. I used some of the cut apart cards, 12x12 papers, ephemera and enamel dots. I used foam to attach some of the stickers so they pop off the card.


For the final card I used the Creative Expressions Winter Wreath Embossing Folder. I used Distress Inks in two different colours, dabbed red paint for berries and glued an embroidery thread around a stamped sentiment. 

I still see the Winter Market Collection in the shop, so head on over and check it out!