Showing posts with label Paige Evans. Show all posts

Monday, December 19, 2022

Garden Shoppe Layouts for Scrap Shotz

  Today I have two layouts using the fabulous November kit featuring the Paige Evans "Garden Shoppe" Collection available at Scrap Shotz.


For this layout, I was inspired by the December sketch in the Creative Scrapbooker Magazine Facebook Sketchy group. 


I began by using the Yukon Gold cardstock to matte my photos. Then I used a variety of papers and a stencil to cover the page. 


The pink border in the middle is washi tape. The rest of the layout is full of Thicker stickers, layered stickers, ephemera and stickers from the awesome sticker book. 


The second layout features one of the papers in the kit. I cut the center out of the paper to create a border. Then I used the washi tape to cover the seam between the two papers. 


The paper actually has the stitching drawn on it, so I stitched over it to add some texture. 


The title matches perfectly with the stitching and come with the Thicker alpha set. The hearts in the center are cut from the paper that I removed from the center. They are actually covering up the words "Merry Christmas" as this was our card from last year. Shhh, don't tell anyone! 


Thanks so much for stopping by today!

Monday, December 12, 2022

Garden Shoppe Interactive Card for Scrap Shotz

 Hello everyone! I saw a really cool card on Instagram @rippels_paperlover and thought I would give it a try for my daughter's birthday. It was a big hit! I've put together a tutorial using the Paige Evans "Garden Shoppe" Collection in the November kit. 

Here is a video to show how it works:


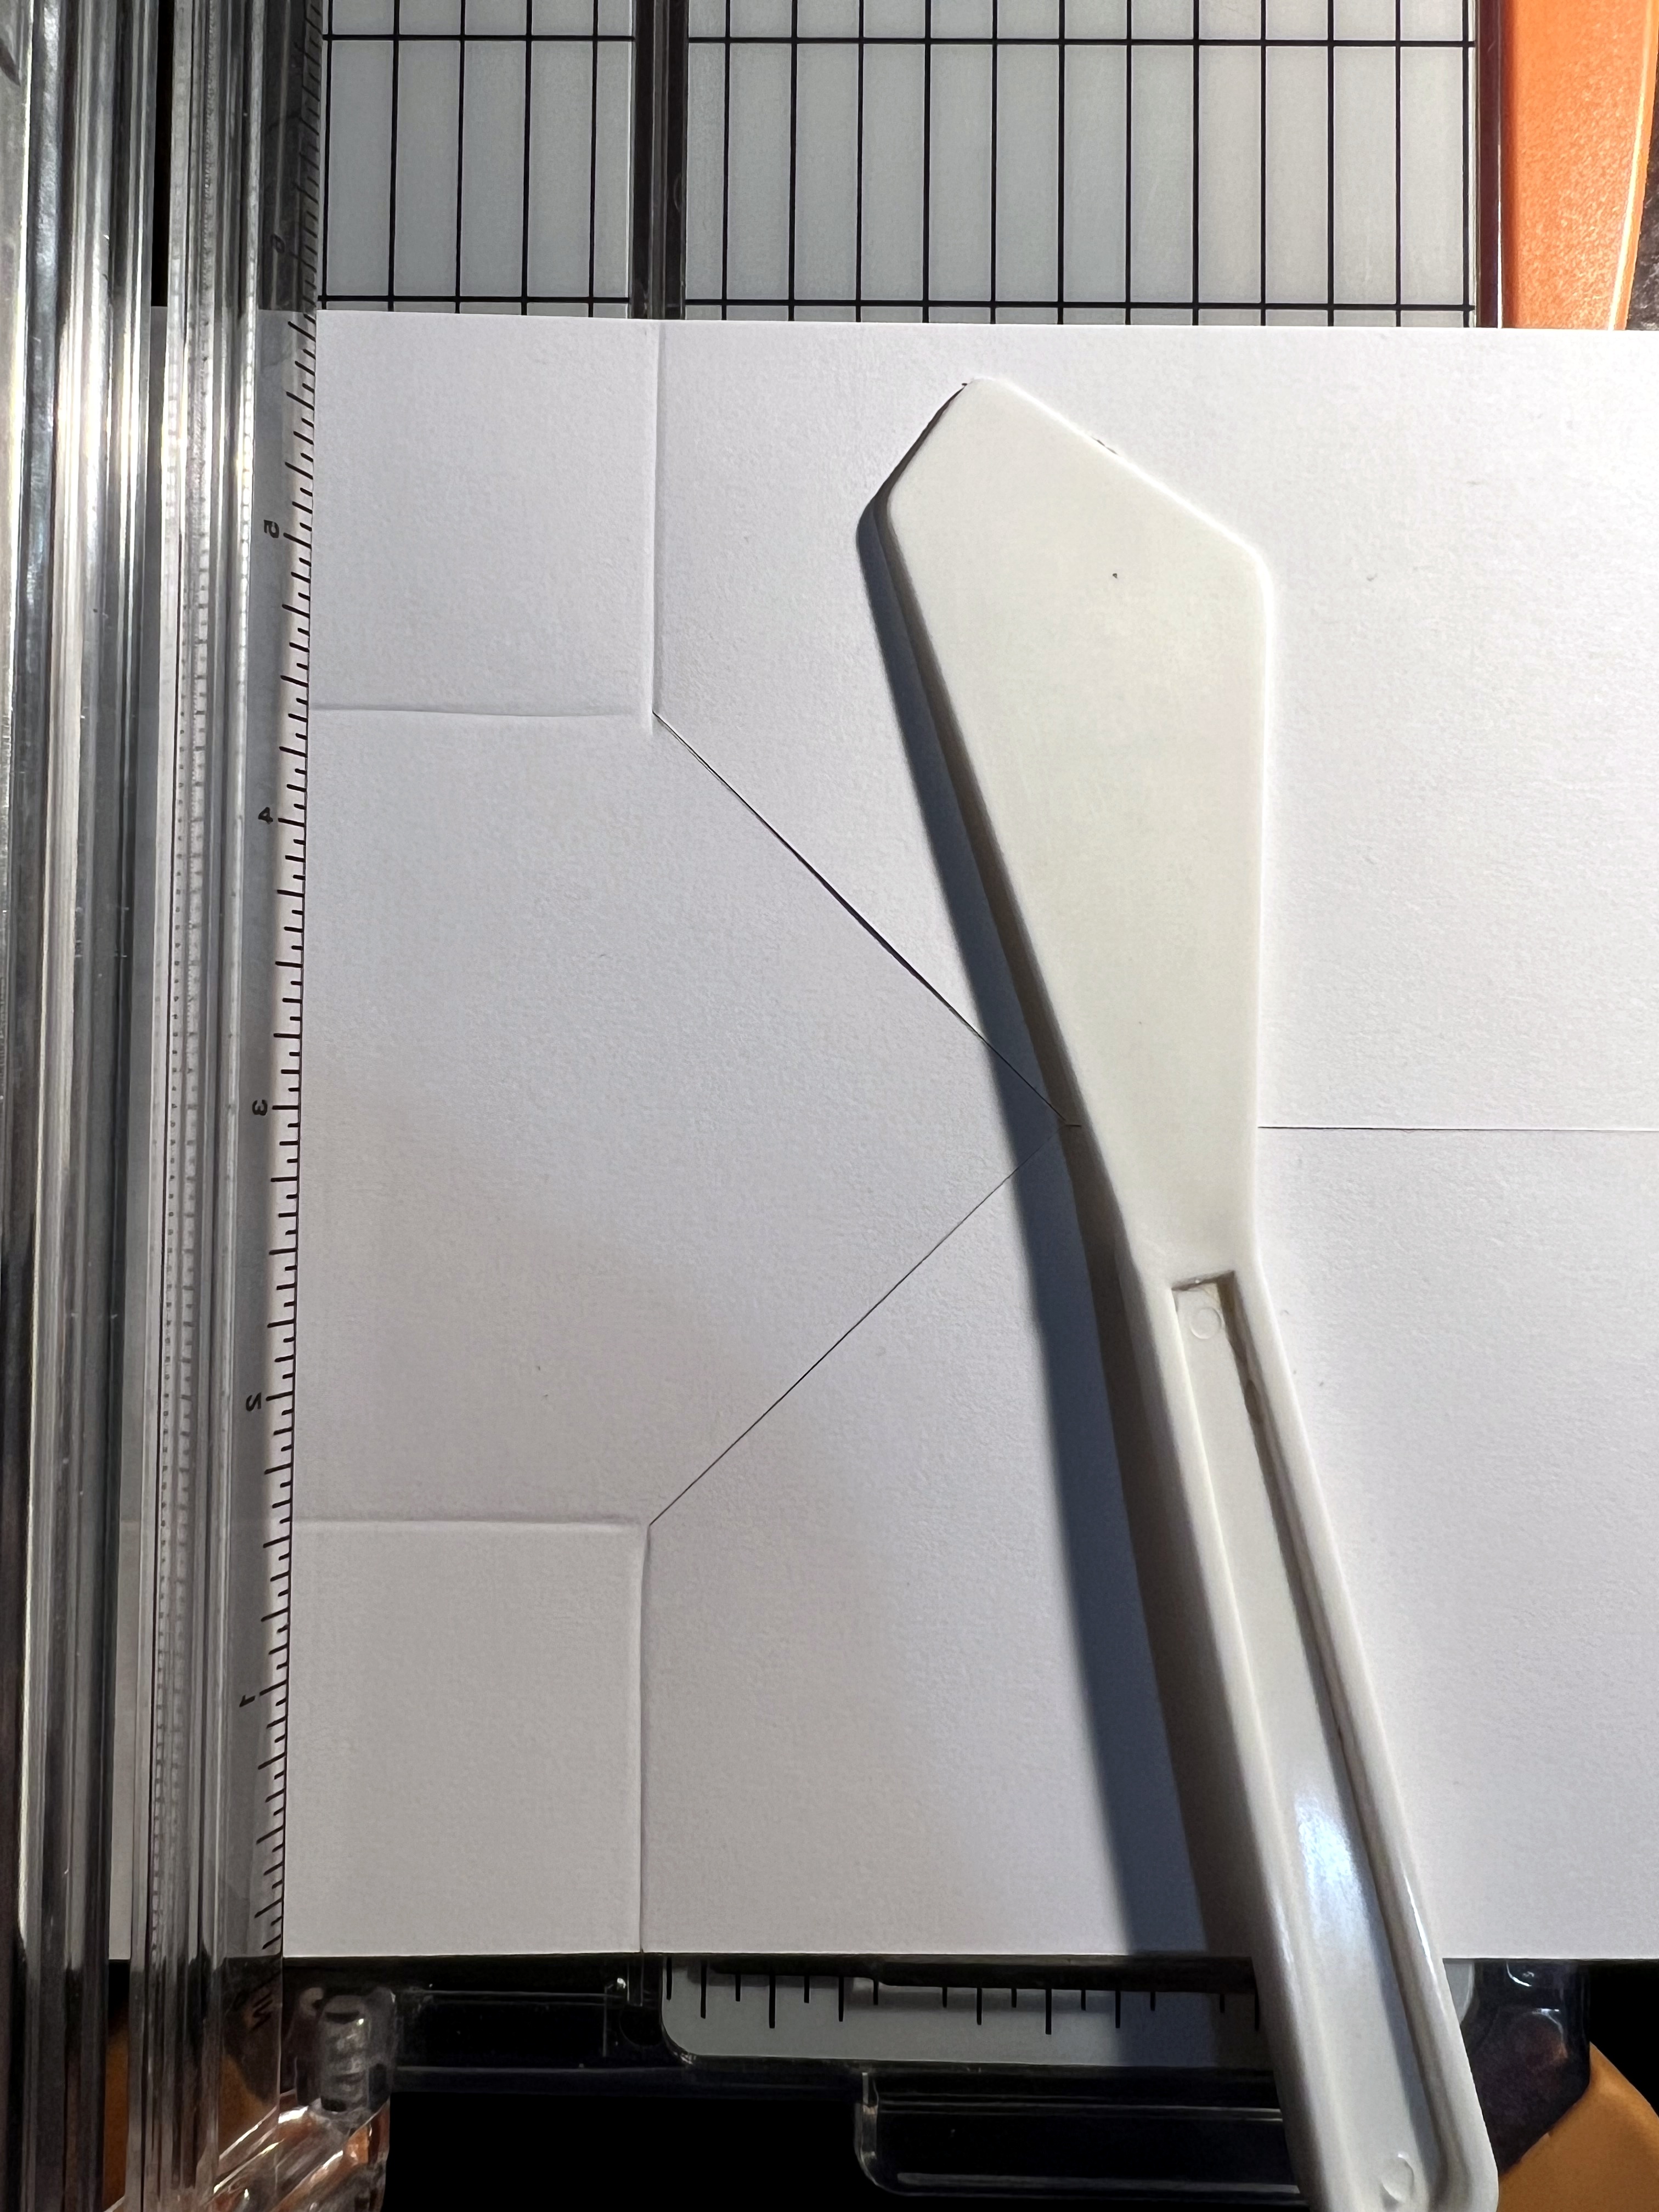
I made a cut file on my Silhouette so I can easily make another card in the future. Here is a picture with the dimensions so you can make it yourself using a crafting knife or cutting machine.


Next, I scored the folds into the card by using a palette knife and my paper cutter. 


The scores should be 3 inches long vertically and 1.5 inches horizontally. 


Here is how to fold the card. Step 1 - Bring the left side towards the middle and let the center flip around.


Step 2: Repeat on the right side. 


Step 3: Flip the paper over.
Step 4: Bend the square piece at the top backwards so it now looks like the picture below.


Step 5: Repeat with the square at the bottom flipping it towards the back. It should now look like the picture below.


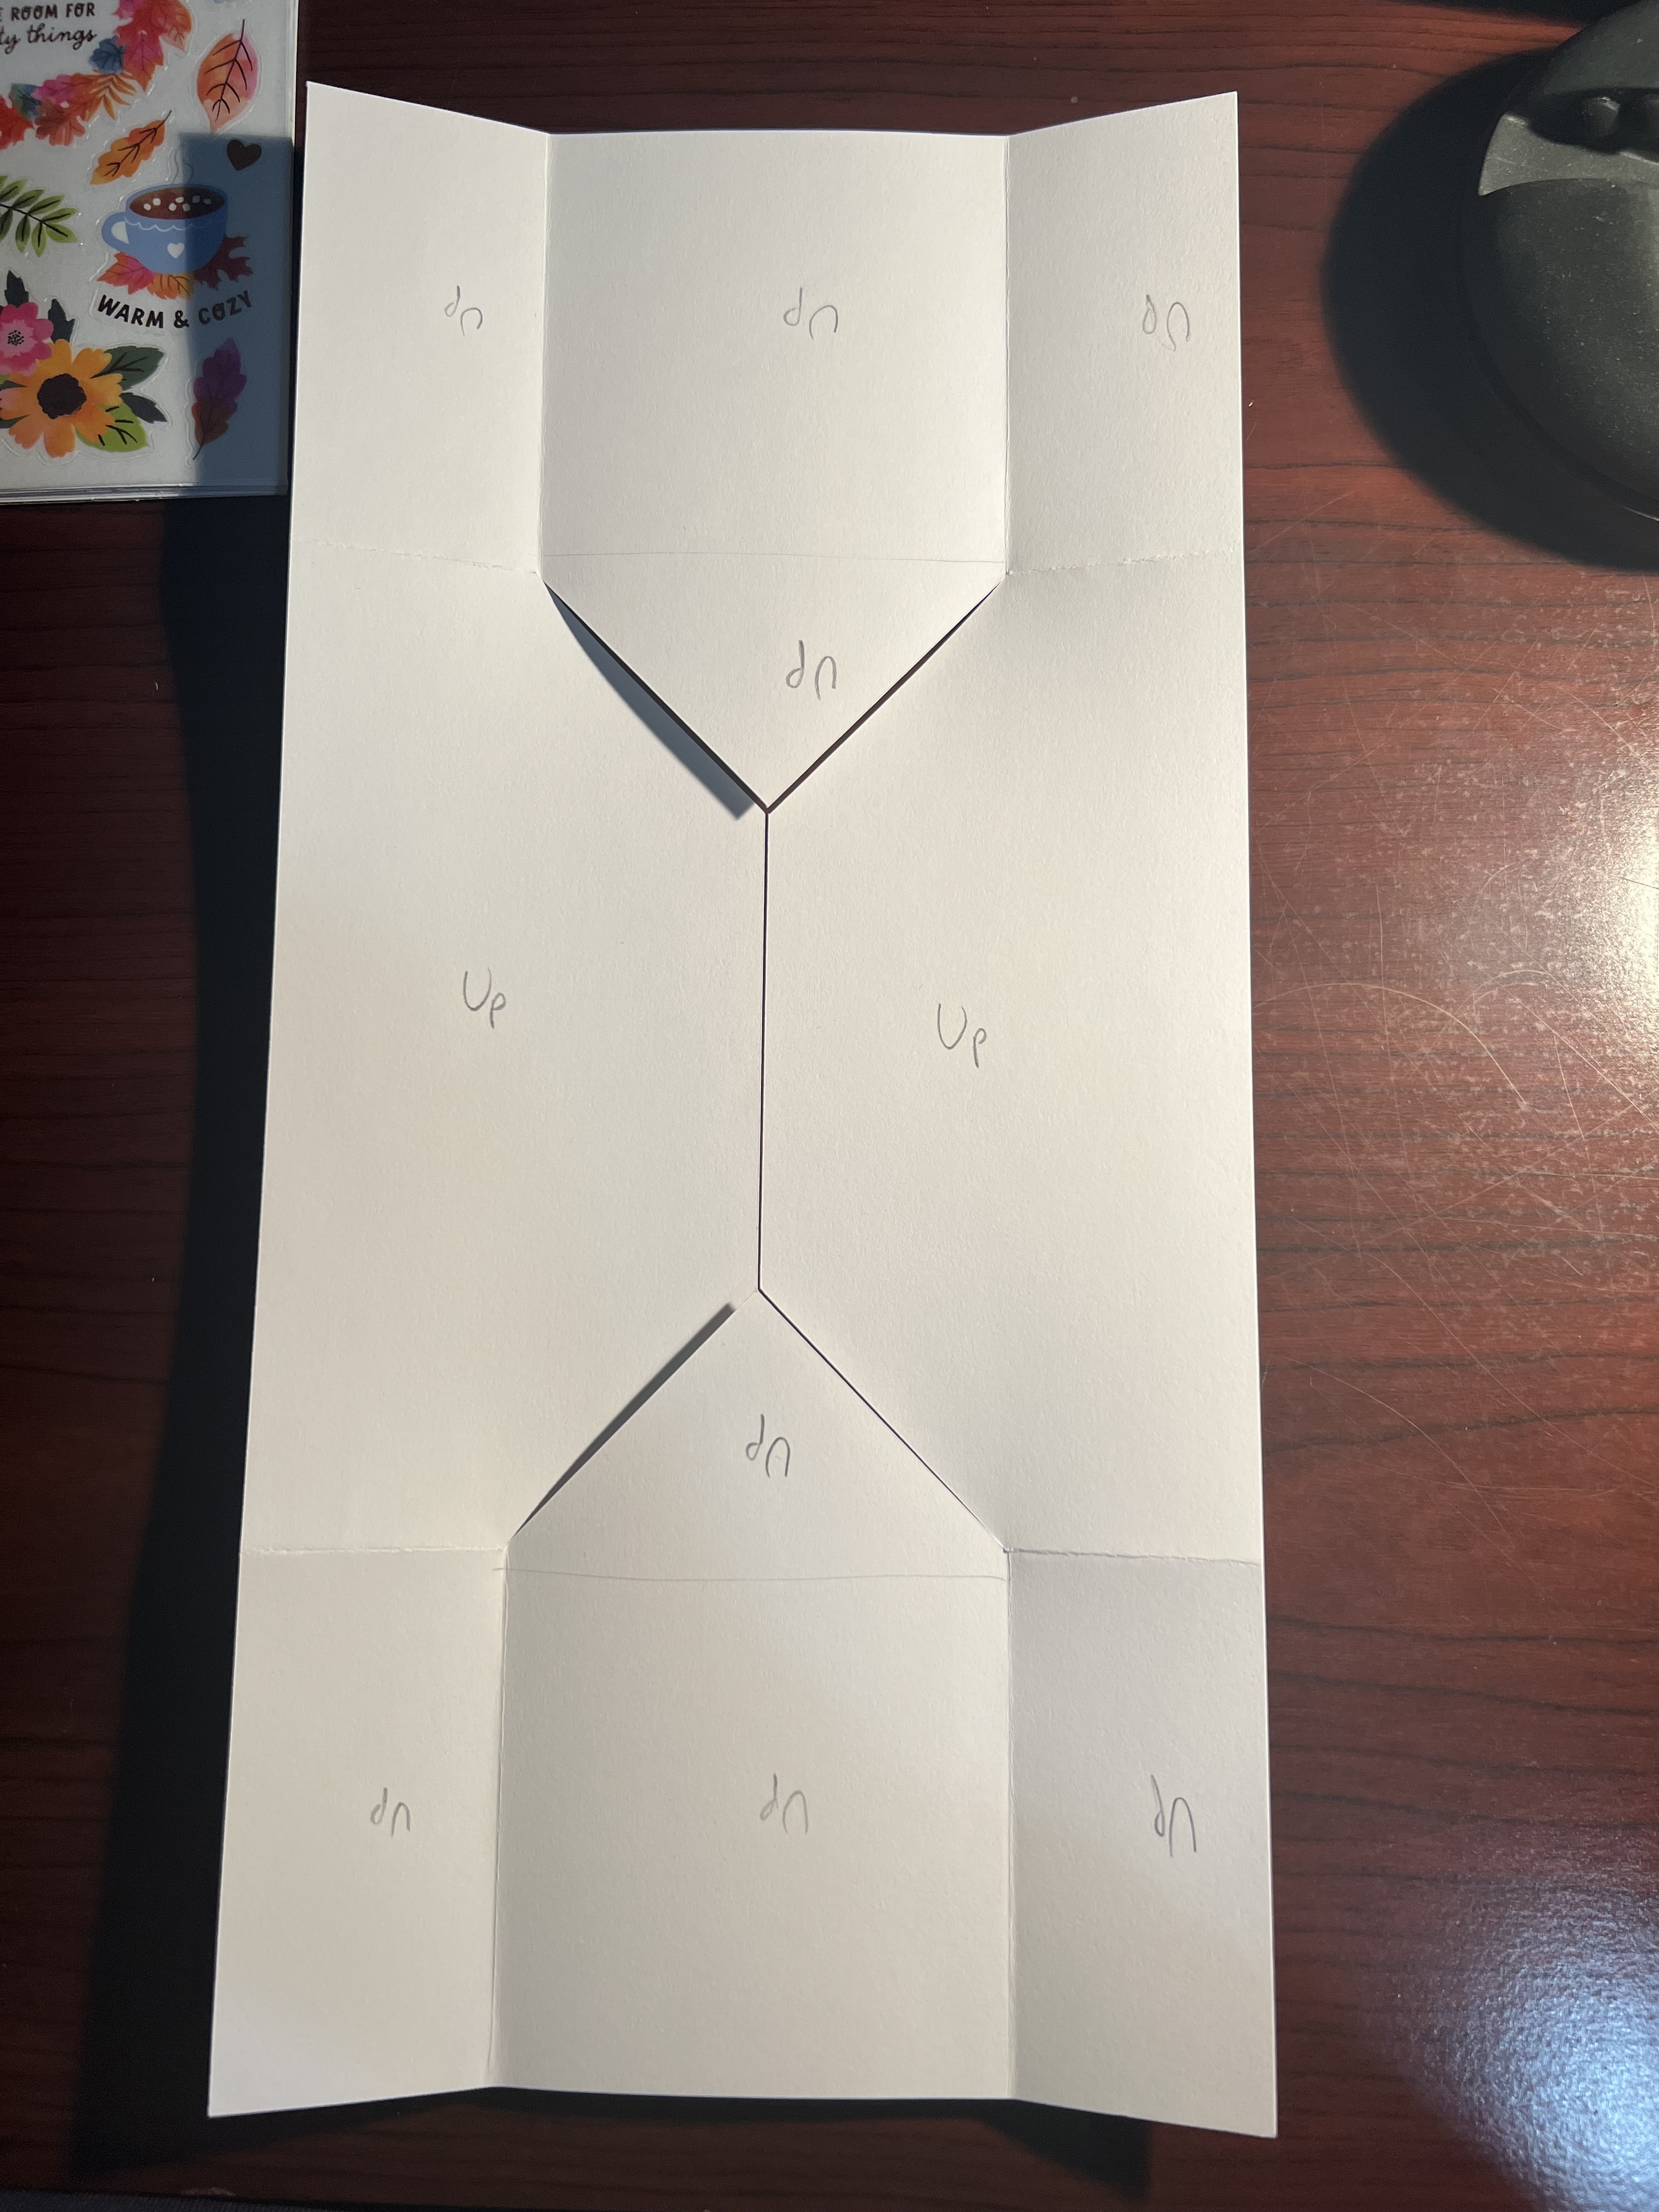
Step 6: Now you can open up the card and lay it flat on the table. I marked all the sections with the word "up" so I could easily cut the papers that go on top in the right direction. 


Step 7: Flip the paper over and write the word "up" on each section. However, be careful, some sections are upside down. 


Step 8: Begin cutting papers to adhere to the card. I found that by cutting a second card on my machine and then cutting out each section, I could use those pieces as stencils and trace them. 

Side 1: I used one piece of paper and cut it into sections. Then I made a title with the alpha Thickers. I also used some Thickers for the leaves and hearts. There are a few stickers from the sticker book. The sections are outlined with washi tape. Finally, the flowers are from the die cut pack. 


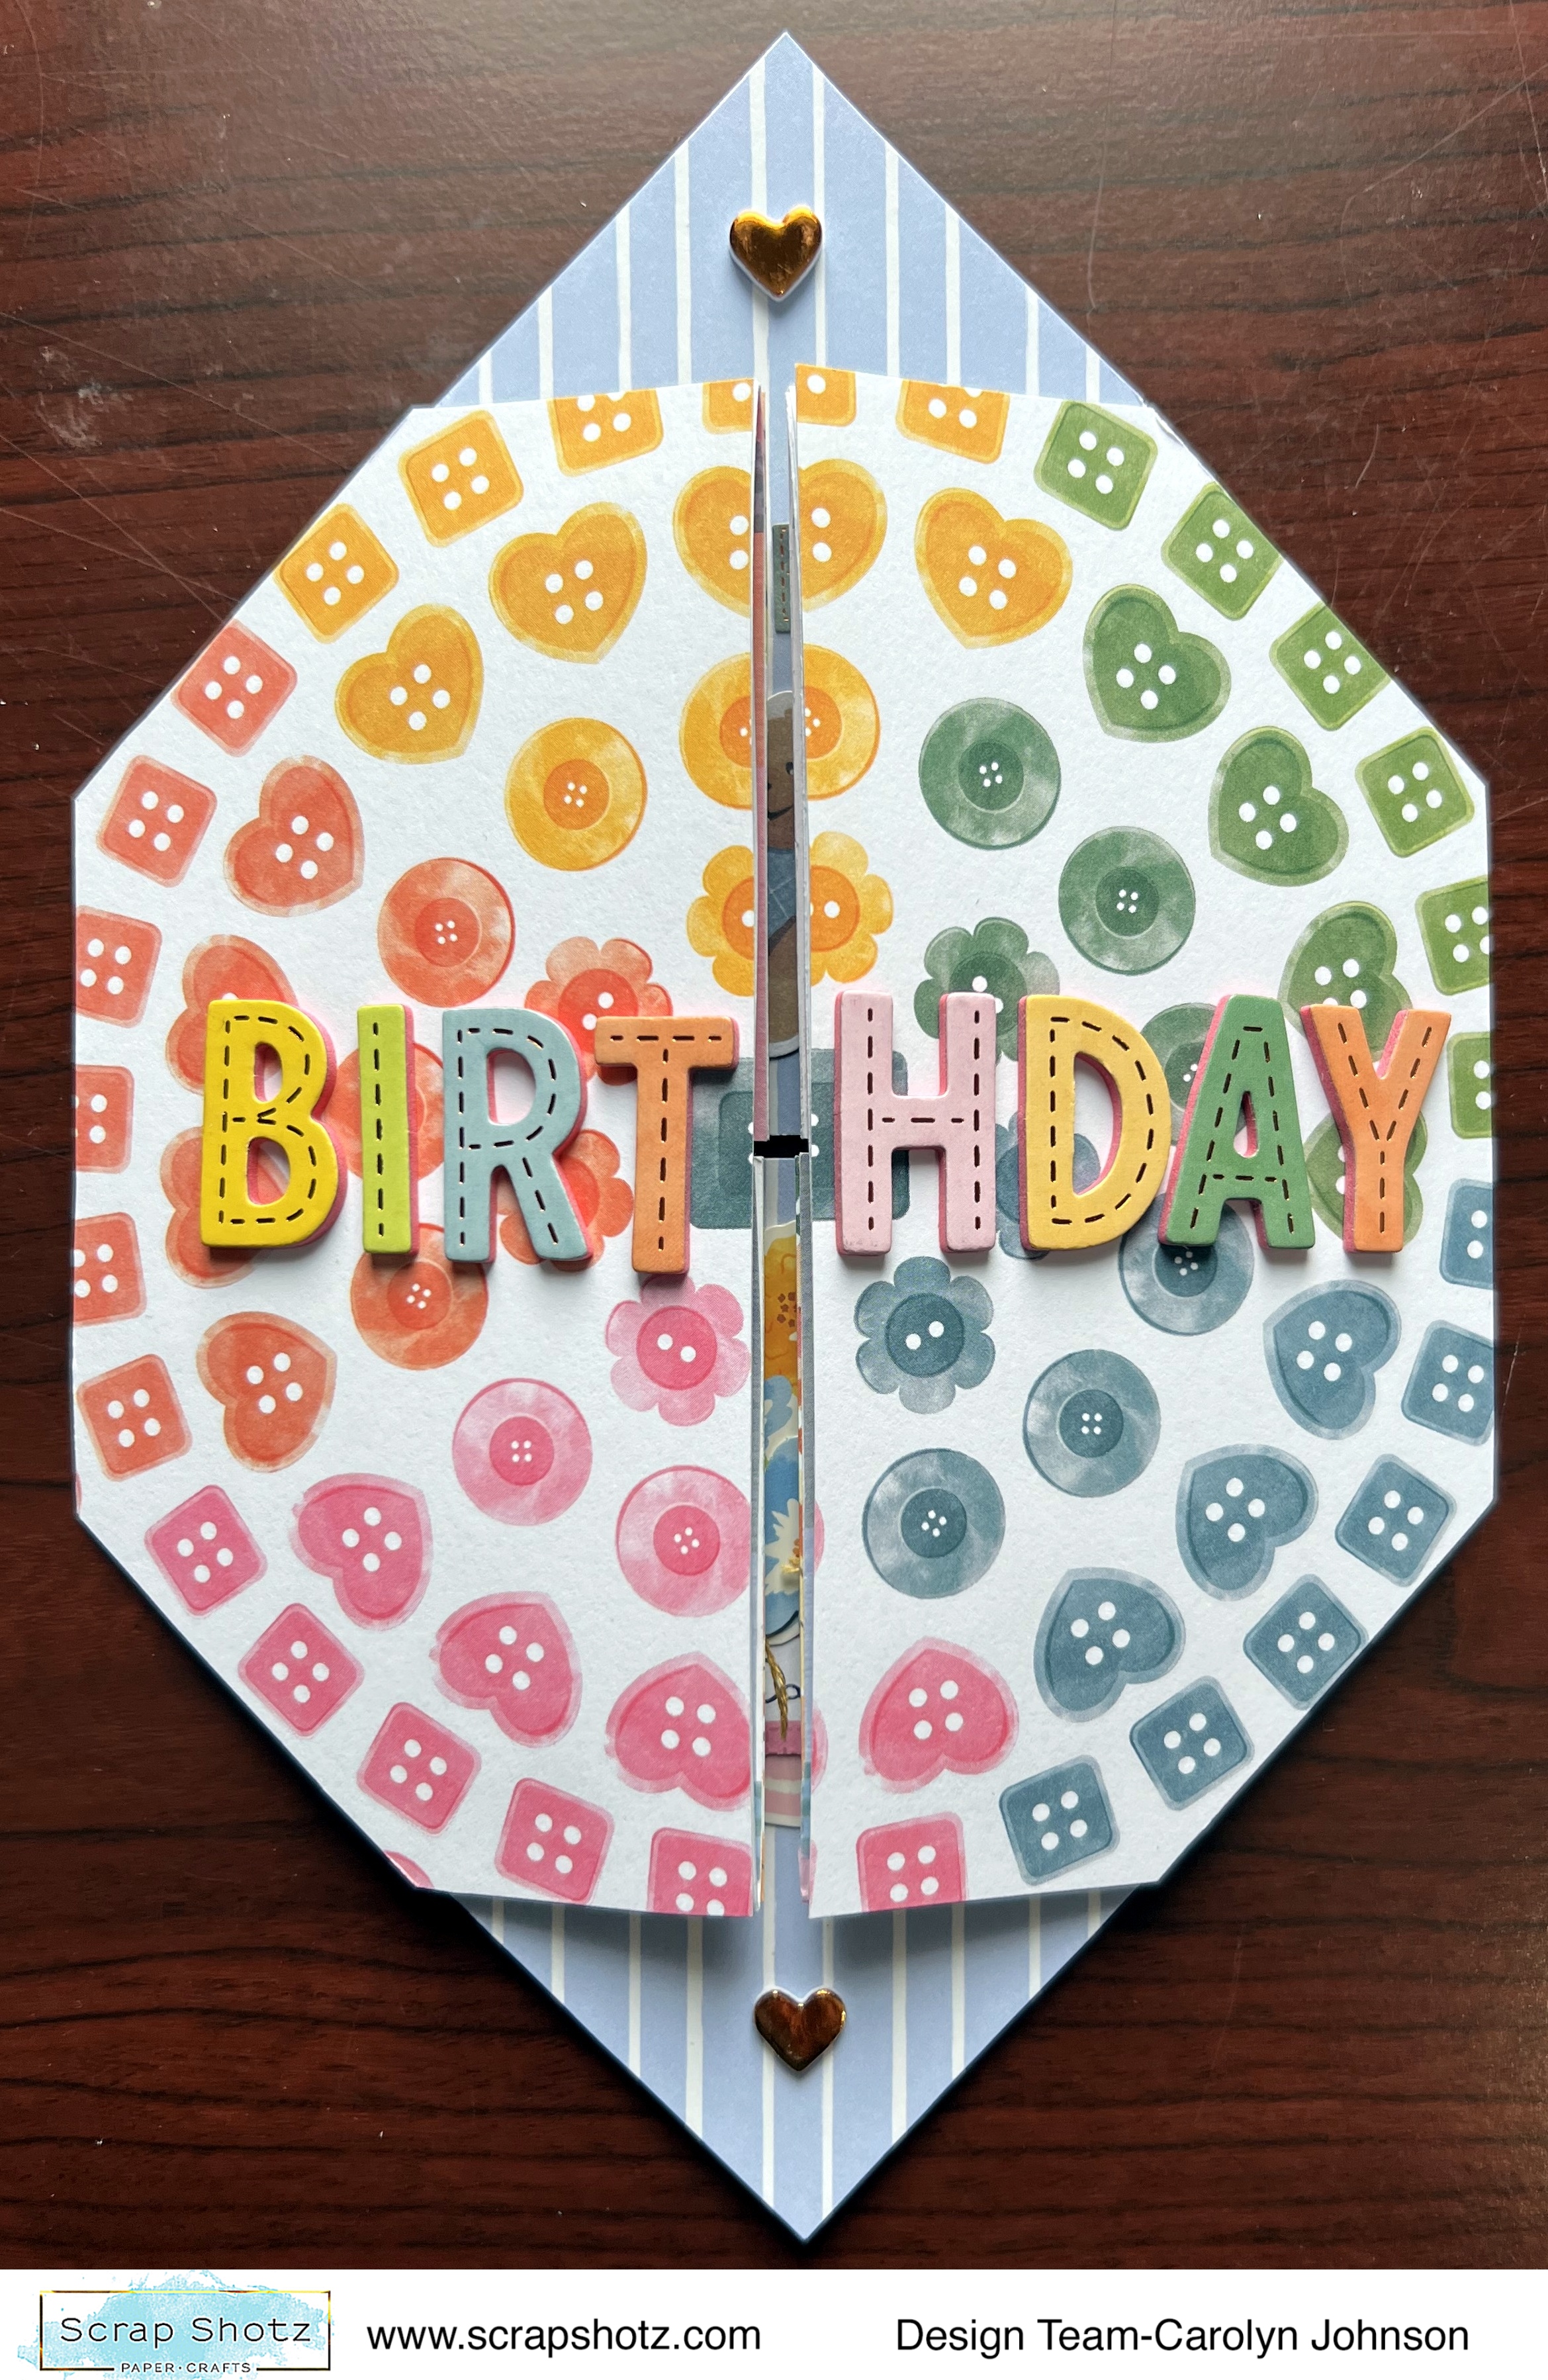
Side 2: I used the button paper and added the title with Thickers.


Side 3: This is what the card looks like with the top sections flipped back.


Side 4: I used the alphas from the sticker book for the title. I used some die cuts to decorate and embroidery thread to make bows. The flowers are from the layered sticker pack.


There you have it! I hope you have a chance to try it out!

Friday, June 26, 2020

Bloom Street Layouts with the May Scrap Shotz Kit

Hello! Today I have two layouts to show you with the May Kit. This kit is fabulous!
It is full of Pink Paislee - Bloom Street. Pretty pastel colours fill the pattern papers. I'll be using every piece of this kit.

My first layout is of my daughter wearing my glasses. I cut a giant cut file of glasses using the Bazzill cardstock in the kit and some black from my stash. The green part is an inner offset of the outer black part. Then I fussy cut flowers like crazy from this paper.
The background I covered in gesso and then sprayed with green, yellow and blue Colorshine. The square cards come from the 2x2 paper pad. I layered them in some places.
The title is made from foam Color Vibe Stickers by Simple Stories. The purple flower with a gem in the center is from the mixed embellishments pack. I used a pop dot to adhere it to the page which works really well.
I finished decorating the page with phrase stickers from the cardstock sticker sheet.
The journaling was done on a card from this sheet.
My second layout was inspired by the June sketch in the Creative Scrapbooker Magazine Facebook Group. 
Here is the sketch:
I followed the sketch really closely. I used a mixture of patterned papers but since I used butterflies on the base it only made sense to decorate with the Dimensional Butterfly Stickers. I tried to bend the wings so they would pop off the page. 
I love mixing fonts for a title. Here is an example:
That's all for me today. I'll be back on Monday with some more inspiration. Have a great weekend!

Tuesday, February 12, 2019

Cool Cousin for Sketches In Thyme

Today we have a neat sketch over at Sketches In Thyme. There are so many ways to interpret this, I can't wait to see what everyone does! I chose to do flowers and butterflies.
Lots of fussy cutting and a little bit of sewing. Here is the sketch.
No photo description available.
Supplies
Pink Paislee - Turn The Page by Paige Taylor Evans
Black fine tip Sharpie pen
White cardstock
White thread
iCraft / Thermoweb decorative black photo corners
Thanks for stopping by! Have a great day!